 |
| Image Credit: Abundant Family Living |
Every time I try to get into scrapbooking, I get discouraged. I’m not especially creative and making a memorable scrapbook can be time consuming. I enjoy digital scrapbooking because there is no mess and I can do it all right on my laptop by placing photos into premade template pages.
However, I do get the occasional urge to make a few cutsy scrapbook pages and try again. My problem is patience. I don’t have any.
Recently, I learned that some people make mini scrapbook albums from envelopes, paper bags, and manila folders.
These albums can be made within a few hours and they make great gifts with or without added photos.
Here is how I made mine:
Make a Scrapbook from Manila File Folders
First, I obtained four manila file folders. It doesn’t matter if there
are marks or writing on it because any imperfections will be covered
with decorative paper.
I cut the tabbed edges from the folder so that all the edges match up
evenly. Then, I opened the folder up and folded it upward to make a
horizontal crease which resulted in four sections with creases. With
scissors, I cut the folder up along the vertical crease, but only halfway.
This is so that the pages will open up correctly while viewing photos.
After I cut the folder, I folded up the flaps and then folded the folder
together to make the first pages of my undecorated book. I did the same
thing with three other manila folders.
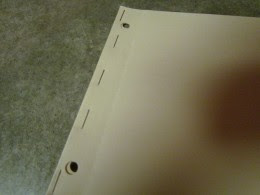
After all the folders were cut and folded, I used a hole puncher to
punch holes in the binding and then stapled the folders (pages)
together. I’m glad I punched the holes before I stapled the folders
together. Otherwise, the book would have been too thick for my stapler.
Then, I flipped through and decided what I wanted each page to look
like. I cut and trimmed to make packets on some pages while other pages
folded down.
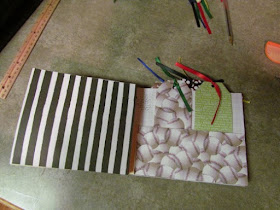
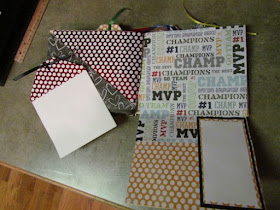
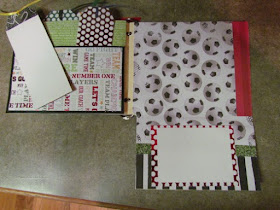
Then, I decorated each page with coordinating papers. This particular
book features a sports theme. Inside the pockets of my book, I added
tabs. They look like book marks. I added decorative paper to one side
where small photos can be applied. On the other side, I pasted white
paper for journaling. Photos can be arranged on the pocket and back page
and on the tabs. While viewing the photos, the tabs can be pulled out
so that the person viewing the photos can read about the event.
Finally, I added two rings on the binding and I attached ribbons to the
tabs. My book was finished. I made this particular book as a gift for a
friend. She will add her own photos later.
These books are adorable and can be made fairly quickly. They make cute
gifts for birthdays, anniversaries, graduations, and even weddings. You
can make one for vacation photos or you can make brag books for new
parents and/or grandparents. The possibilities are limitless.
Helpful Hints:
Make sure you staple any pockets before adding decorative paper. Otherwise, the staples will show.
Use a quick drying glue. I used Modge Podge for decoupage because it
last forever and dries quickly. However, this means you will have to
place your decorative paper carefully and quickly. Once you place the
paper, you won’t be able to remove it without tearing it off.
(Some people use glues sticks, but I don’t recommend it. Stick glue does
not adhere well over time and you want this book to last.)
You can decorate the pages before stapling them together if you like.
This way, you can get the decorative paper all the way into the inner
binding. However, when I tried this with my second book, I ran into a
few problems. I had forgotten to staple pockets together before
attaching my paper. I also forgot to consider the binding when centering
paper and placing journaling areas. I ended up having to trim part of a
decorative frame off in order to make a page fold properly.
Don’t forget to cover the binding with paper for neatness.
Below are photos of my finished product.
You might also like:


No comments:
Post a Comment